How to Efficiently Organize Kitchen Drawers in 7 Steps.
Kitchen drawers – those magical caverns that hold the key to culinary creations. But let’s be honest, sometimes they morph into chaotic abysses, swallowing utensils whole and spitting them out in a frustrating game of hide-and-seek. However, with a little planning and some clever organization techniques, you can transform your drawers from battlegrounds to blissful havens of efficiency.

Step 1: The Great Kitchen Drawer Eviction
The first step to organize kitchen drawers is a clean slate. Grab a trash bag, a recycling bin, and a donation box (because let’s face it, not everything deserves a second chance). Take everything out of your drawers and ruthlessly declutter. Here’s your mantra: “Do I use this? When was the last time? Does it spark joy?” (Okay, maybe not the last one, but you get the idea.)
- Toss: Broken utensils, expired spices, mystery gadgets with unknown purposes (you know, the ones lurking in the back that look vaguely medieval).
- Recycle: Food wrappers, plastic bags you swear you’ll reuse (but never do).
- Donate: Gently used gadgets you just don’t reach for anymore.
- Deep Clean the Drawer: Wipe down the drawer interior with a damp cloth and mild detergent. This removes crumbs, spills, and any lurking grime.
Step 2: Categorize and Conquer
Now that you have a mountain of (hopefully) useful kitchen tools, it’s time to group them into categories. Here are some common ones:
- Utensils: Whisks, spatulas, spoons, tongs, turners – the foot soldiers of your culinary army.
- Cutlery: Knives, forks, spoons – the sharp shooters and frontline fighters. (Store knives safely on a magnetic strip or in a designated knife block.)
- Cooking tools: Whisks, graters, peelers, measuring cups – the specialized weapons for specific tasks.
- Baking essentials: Rolling pins, cookie cutters, spatulas, measuring spoons – the artillery for pastry perfection.
- Gadgets: Bottle openers, corn cob holders, avocado slicers – the niche tools used on occasion. (Be honest, how often do you really need that melon baller?)
- Linens: Dish towels, pot holders, oven mitts – the frontline defense against heat.
Step 3: Know Your Space: Measure Twice, Organize Once
Before diving into drawer dividers, take a moment to measure the depth and width of your drawers. This ensures you purchase organizers that fit snugly and maximize space. Consider the number of ut
ensil categories you have and how much space each category needs. Deep drawers might benefit from tiered organizers, while shallower drawers might require a single layer.

Step 4: Finding a Home for Every Utensil – Organize Kitchen Drawers for Efficiency
This is where the real transformation happens. Here’s how to make the most of your drawer space:
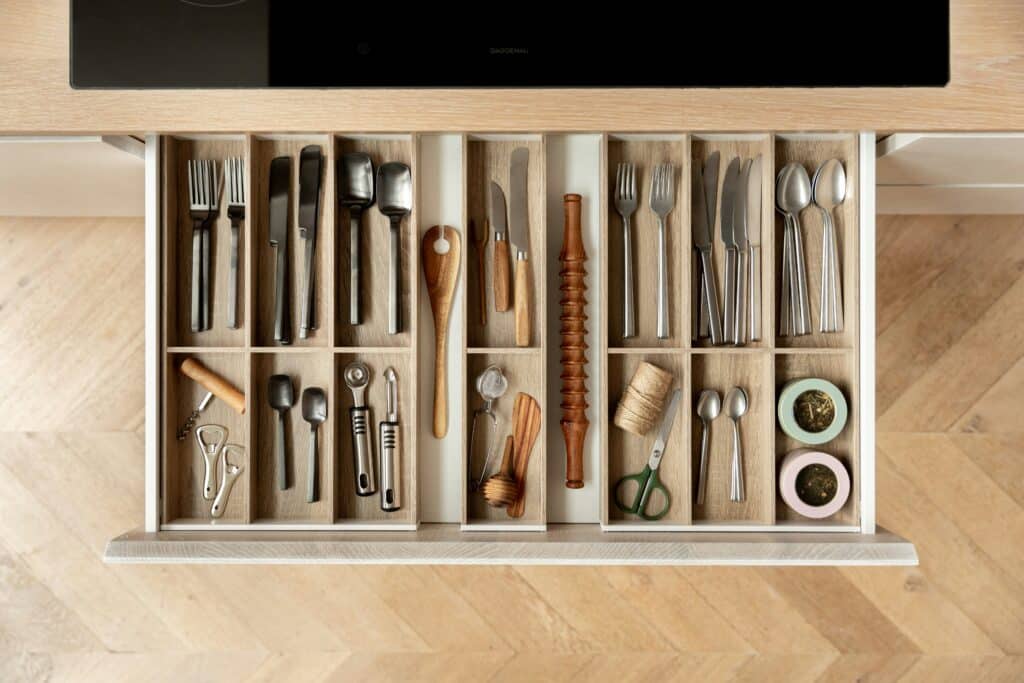
- Utilize drawer dividers: Adjustable or pre-configured dividers are your best friends. They create designated zones for different utensil types, keeping everything neatly separated. Consider adjustable bamboo drawer dividers for a sleek look.
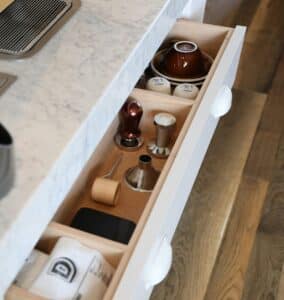
- Embrace drawer organizers: Trays and bins are lifesavers for smaller items like measuring spoons, spatulas, and whisks. Clear options allow you to see what’s inside at a glance, while colorful ones can add a pop of personality.
- Tier it up: Utensil caddies or tiered organizers can maximize vertical space in deep drawers. This keeps frequently used items within easy reach.
- Think outside the box (or drawer, in this case): Wall-mounted utensil racks or hanging organizers free up drawer space and keep utensils readily accessible.
- Label love: Labeling containers or drawers with clear categories (think “Spatulas” or “Baking Essentials”) is a game-changer. It makes finding things a breeze and ensures everyone in the household knows where things belong.
Step 5: Employ Creative Storage Solutions
Think outside the box (or drawer) with these ingenious storage hacks:
- PVC Pipe Utensil Holder: Repurpose PVC pipes into DIY utensil holders. Cut them to desired lengths, secure them to a wooden base, and enjoy a rustic yet functional organizer.
- Vintage Tins: Upcycle those beautiful tins from cookies or candies! Clean them thoroughly, line them with decorative paper if desired, and use them to store smaller utensils like whisks or measuring spoons. The vintage charm adds a touch of personality to your kitchen.
- Coffee Can Caddies: Give those used coffee cans a second life! Paint them in a cohesive color scheme, drill drainage holes if necessary, and mount them on a board to create a wall-mounted organizer that frees up drawer space and adds a touch of rustic charm.
- Magnetic Marvels: If your drawers are metal, utilize magnetic strips! Mount them on the sides of the drawer and attach magnetic spice tins or small containers to hold things like cupcake liners, rubber bands, or bag clips. This keeps them readily accessible without taking up valuable drawer space.
Step 6: Optimize for Everyday Use
Now that you know how to organize kitchen drawers, consider how you use them most often. Here are some pro tips for peak efficiency:
- Prime Location: Place frequently used items like cutlery or cooking utensils in drawers closest to where you use them most (think silverware near the dishwasher, cooking tools near the stove).
- The Power of Vertical Storage: Store lids vertically in a designated divider or container to prevent them from becoming a chaotic jumble.
- Embrace Stacking (Smartly): Stack plates or bowls strategically, using plate dividers to prevent chipping. But remember, don’t overdo it – a leaning tower of plates is an accident waiting to happen.
- Roll with the Punches: Rolling up dish towels and pot holders saves space and keeps them organized.

Step 7: Maintaining the Mayhem-Free Zone
The key to long-lasting organization is consistency. Here are some habits to keep your drawers in tip-top shape:
- The One-In, One-Out Rule: When you acquire a new utensil, ruthlessly get rid of an old one you no longer use. This prevents clutter from creeping back in.
- The Quick Clean: After each cooking session, take a few minutes to wipe down surfaces and put everything back in its designated spot.
- Regular Decluttering: Organize kitchen drawers on a regular basis: schedule a quick decluttering one a week to keep ahead of the chaos. Every few months, re-evaluate your drawer organization. As your cooking habits evolve, adjust the layout to maintain optimal functionality.
Conclusion: The Perfect Kitchen Awaits
By following these steps and embracing creative solutions, you can transform your kitchen drawers from battlegrounds to havens of efficiency. Remember, organization isn’t just about aesthetics; it’s about creating a space that fuels your culinary creativity and makes cooking a joy. So, take a deep breath, grab your sorting bins, and get ready to conquer the kitchen drawer chaos!
Do you need help organizing your kitchen? Call Harmony Home Organizing today at (604) 644-3939


